
Procedures
When you click on the icon for Cases, you will be brought to a screen with a grid showing all of your cases entered to date. You will also notice that there is a a filter that will allow you to search through your cases if you know the medical record number of the case you are looking for.
Creating a case
To create a new Case, click the New button from the right side of the grid.

The editor will open and you can see the different fields to be filled out. At any point during case entry, you can save the case by clicking on the save button to the right of the fields.

First, you can enter in the date or click on the calendar icon to the right of the date box to choose the date for the case entry. You can also select your location and supervisor using the drop downs in the next two fields. You can then enter the record number as well as the patient name, and additionally any comments about the case.

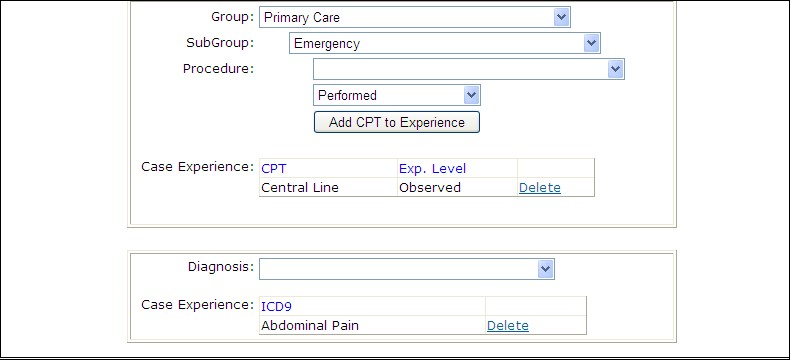
Adding CPTs & ictd9
Next, you can enter in your CPTs and the experience level. Click Add CPT to include case experience. Select your ICD9 from the drop down list. You can delete CPTs or ICD9s by clicking the delete links in the grid that corresponds to the CPT/ICD9 to be erased.
The new case will show up on the grid and can be edited at any time.

Deleting a case
If you erroneously create a case and want to delete it, you can select the case from your Cases grid and click the Edit link. Once in the case editor, you can select the Delete button from the right side. Cases can only be deleted on an individual basis from the editor to ensure that the correct cases are deleted.
Duty Hours ->